Cedar & Breath Stand steady. Breathe first.

Pose guides

Nine standing poses

Free, and each one carries its care note and its chair or wall version in the same box and the same typeface as the pose itself. A chair version printed somewhere else is a chair version nobody uses.

Before you start

Three things that apply to every pose below, so they are not repeated nine times.

  • Barefoot, on a floor that does not slide. Socks on a wooden floor are the single most common way people come unstuck in standing work. A mat is useful and bare boards or a short-pile carpet are fine. A rug on a hard floor is not.
  • A wall or a chair within reach, always. Not for when you need it — from the start, every time. Reaching for something that is not there is how a wobble becomes a fall.
  • Breathing is the test. In every pose on this page, if your breath has gone short or you are holding it, come out. A sensation that stays level is fine. A sensation that is growing each time you notice it is the signal to stop, immediately, and that rule overrides every instruction below it.

And the obvious one, stated anyway: these are descriptions of movements, not medical advice, and we have no idea what is going on in your particular body. If something hurts, stop and ask a doctor or a physical therapist. See the Disclaimer.

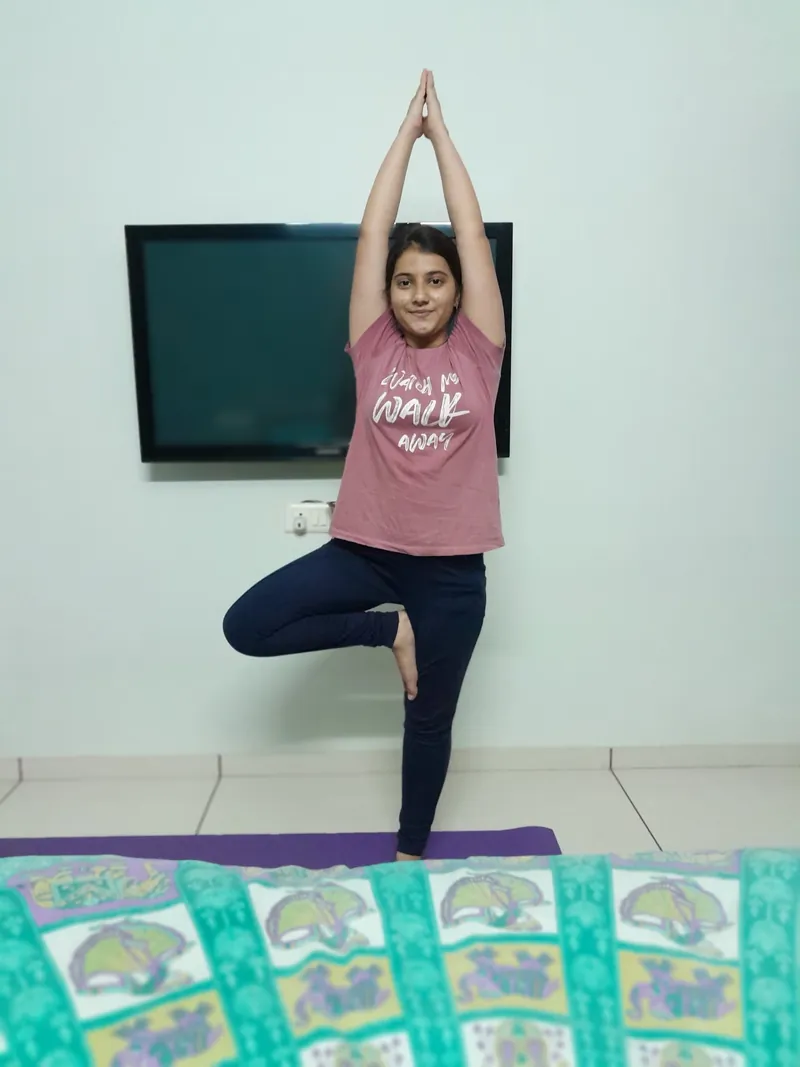
A person standing on one leg with the other foot resting against the inner thigh and both arms lifted overhead.

Tree

Vrksasana

The balance everyone has met. What most people remember is where the lifted foot goes, and that is the part that matters least.

Building it

  1. Stand with both feet down and give yourself ten seconds to notice which parts of each foot are carrying weight. Most of us are further back on the heels than we think.
  2. Shift your weight onto the left foot without letting the left hip swing out sideways. This is the whole pose, and you have not lifted anything yet.
  3. Turn the right knee out and bring the right foot to the left ankle, the calf, or the inner thigh — whichever lets your hips stay level. Never on the side of the knee.
  4. Press the foot and the leg into each other. A foot resting against a leg does nothing; a foot pressing gives you something to balance against.
  5. Arms wherever is useful: hands together at the chest, out to the sides, or overhead. Overhead is harder, not better.
  6. Hold 30 seconds to a minute, then change sides. The second side is almost always worse and that is normal.

Take care

Standing work puts your whole weight through one or two feet, so the rule here is about the floor as much as the body. Keep the lifted foot off the side of the standing knee — above it or below it, never on it. If you are wobbling so much that you cannot breathe steadily, the pose is not working yet; take the foot lower or use the wall. Wobbling is fine; holding your breath is the signal to stop.

With a chair or a wall

Stand beside a chair back or an arm's length from a wall and rest one or two fingertips on it — fingertips, not a grip. A fingertip gives you the information without doing the work, which is exactly the point. Most people can take the hand off after a few weeks and nobody is counting.
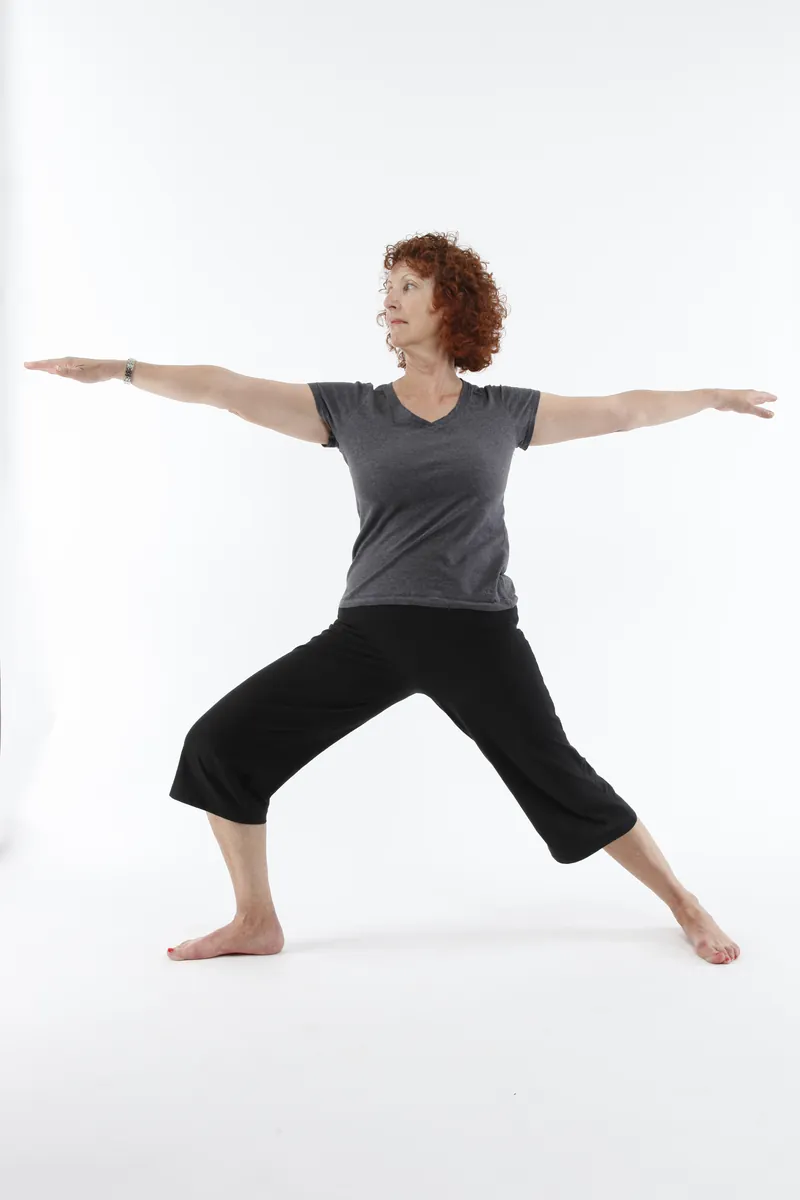
A person in a wide stance with the front knee bent and both arms extended out level with the shoulders.

Warrior II

Virabhadrasana II

A wide stance, one knee bent, arms level. It looks static and it is not: there are four or five separate things to keep deciding about, which is why it is in almost every class.

Building it

  1. Step the feet wide — roughly the length of one of your own legs apart. Too narrow is the most common mistake and it makes everything else harder.
  2. Turn the right foot to point straight out to the side. Turn the left foot in slightly, perhaps fifteen degrees.
  3. Bend the right knee so it travels toward the right ankle, not inward. Watch the knee: if it is drifting toward your big toe, widen your stance rather than forcing the knee out.
  4. Stop bending when the knee is over the ankle, or earlier. A thigh parallel to the floor is a photograph, not a requirement.
  5. Reach both arms out level with the shoulders and look along the front hand. Keep the shoulders down — they creep up within about fifteen seconds.
  6. Hold 30 to 60 seconds. It will start to burn in the front thigh. That is the pose working, and it is different from pain.

Take care

Standing work puts your whole weight through one or two feet, so the rule here is about the floor as much as the body. The knee is the thing to watch here: it should track over the middle of the foot, never fall inward toward the big toe. If it does, you are too narrow — step wider, do not push the knee. Come out before the thigh starts shaking rather than after.

With a chair or a wall

Sit sideways on a sturdy chair, right thigh along the seat, right knee bent over the front edge, left leg stretched out behind with the foot turned out. Arms exactly as above. This gives you the whole upper half of the pose with none of the standing load, and it is a genuinely good version rather than a lesser one.

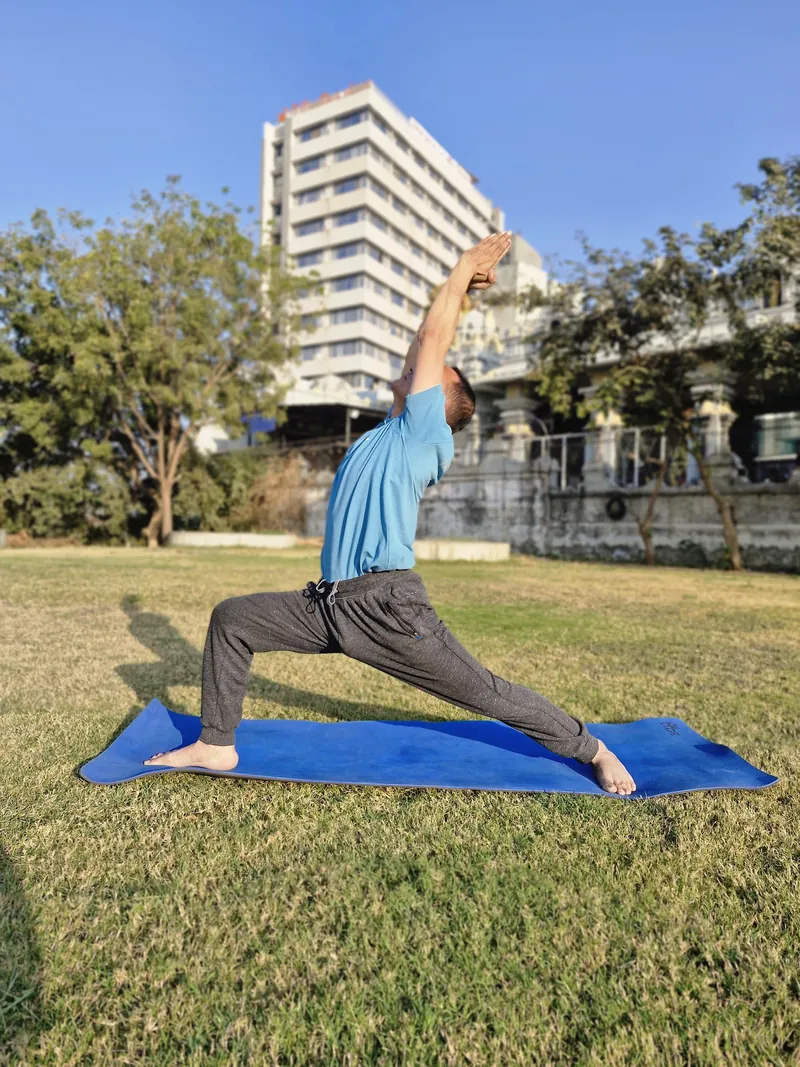
A person in a lunge on grass with one arm reaching up and back over the head and the other resting along the back thigh.

Reverse Warrior

Viparita Virabhadrasana

Warrior II with a side bend added. It is usually taught as a transition and it is worth holding on its own, because it is the clearest demonstration of reaching with one side of the body while the legs refuse to move.

Building it

  1. Set up in Warrior II, right knee bent.
  2. Turn the right palm to face the ceiling.
  3. Lift the right arm up and slightly back, letting the left hand slide down the back thigh. The left hand is a rest, not a push.
  4. Keep the right knee exactly where it was. It will want to straighten as you lift — the whole value of the pose is in not letting it.
  5. Look up at the lifted hand only if your neck is happy to. Looking forward is a complete version.
  6. Hold 20 to 30 seconds, then come back to Warrior II before you change sides.

Take care

Standing work puts your whole weight through one or two feet, so the rule here is about the floor as much as the body. Go nowhere near the end of your side bend — this is a reach, not a stretch, and leaning back is a different and much less useful thing. If the neck objects to looking up, look forward. Come out at once if you feel anything in the lower back.

With a chair or a wall

From the seated Warrior II above, turn the front palm up and lift that arm overhead with the other hand resting on the seat behind you. The side bend is the same; the chair takes the legs out of the question entirely.

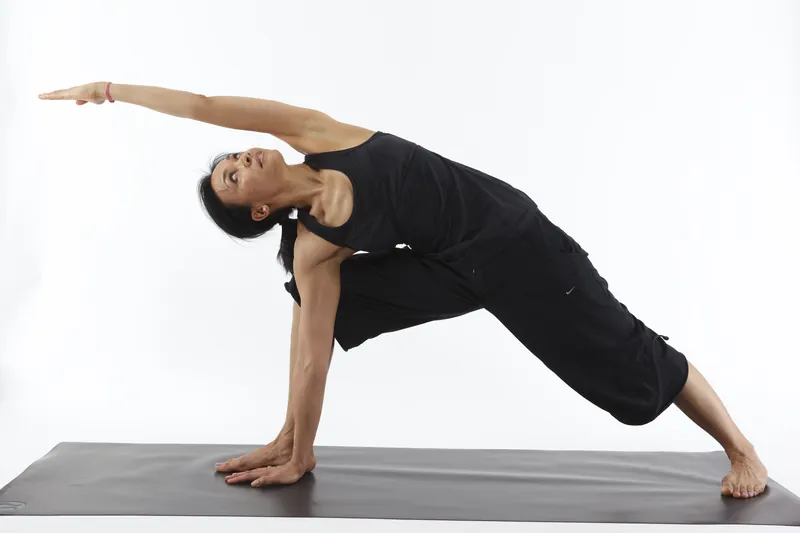
A person in a wide lunge with the lower forearm resting on the front thigh and the upper arm reaching over the ear in a long line.

Extended Side Angle

Utthita Parsvakonasana

One long line from the back heel to the top fingertips. The temptation is to collapse onto the front thigh and rest there; resisting that is the pose.

Building it

  1. Begin in Warrior II with the right knee bent.
  2. Rest the right forearm on the right thigh. Rest, not lean — there should be almost no weight in it.
  3. Reach the left arm up and then over, past the ear, palm facing down.
  4. Push the back foot into the floor. The line you are after runs from that back heel all the way to the left fingertips, and the back foot is where it starts.
  5. Keep the chest turning upward rather than rolling toward the floor. This is the part everybody loses.
  6. Hold 20 to 40 seconds and change sides.

Take care

Standing work puts your whole weight through one or two feet, so the rule here is about the floor as much as the body. Do not put real weight into the hand or forearm on the thigh — it loads the knee from the side, which the knee is not built for. If the top shoulder complains, bring that arm to your hip instead; the pose still works. Keep breathing: if the breath has gone short, come up.

With a chair or a wall

Sit sideways on the chair as for Warrior II, rest the front forearm on the front thigh, and reach the other arm over the ear. You get the full side line and the chair holds everything else.

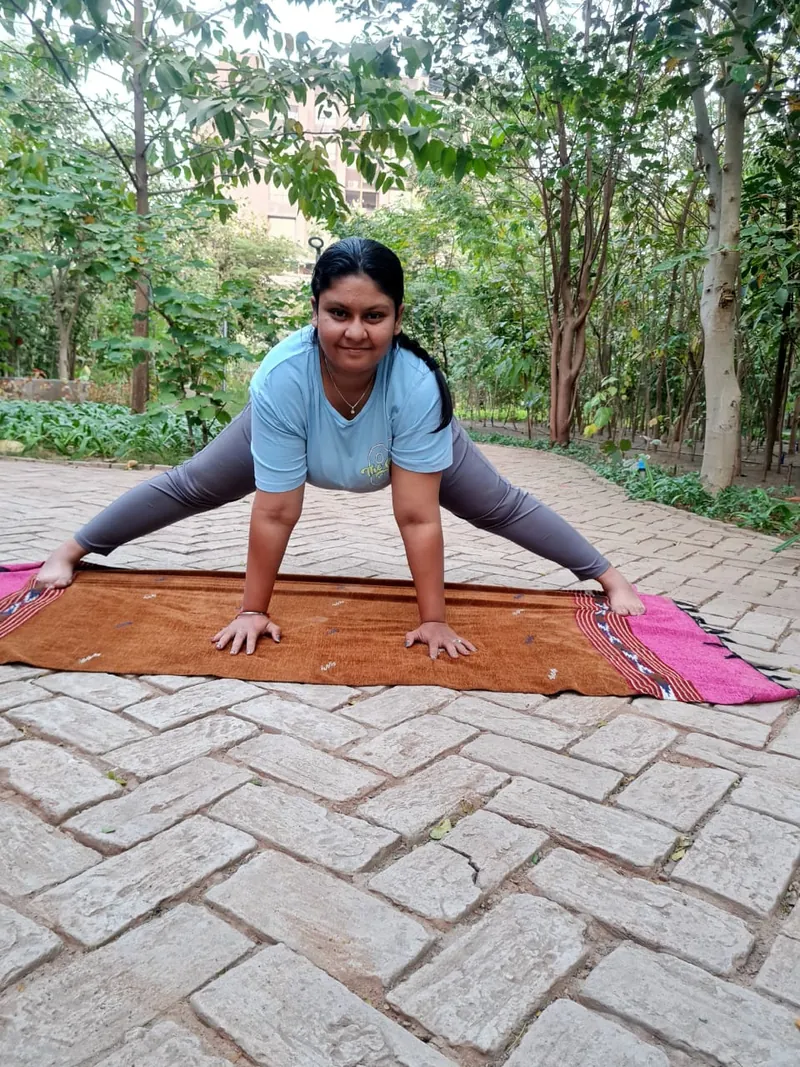
A person with the feet set wide apart folding forward from the hips with both hands flat on the ground between the feet.

Wide-Legged Forward Fold

Prasarita Padottanasana

The one standing fold where the width of the stance does most of the work for you. Easier on the back of the legs than a feet-together fold, and far easier to come up from.

Building it

  1. Step the feet wide, toes pointing forward or very slightly in. Hands on the hips.
  2. Lengthen upward first, then hinge forward from the hip joints — the crease at the top of the thigh, not the waist.
  3. Go down only as far as you can with a long back. The moment the spine starts to round is the moment to stop, whether that is a few inches or all the way.
  4. Bring your hands to the floor, to a chair seat, or to blocks — whatever your hands reach without the back rounding.
  5. Let the head hang. Bend the knees a little if the backs of the legs are shouting.
  6. Hold 30 seconds. Come up slowly, with the hands back on the hips and the legs doing the lifting.

Take care

Coming up fast from any forward fold can make you light-headed, and a wide stance makes that more likely rather than less. Come up on an in-breath, slowly, every time. Skip this one entirely if you have been told to avoid putting your head below your heart, and use the chair version instead.

With a chair or a wall

Stand facing a chair back or a kitchen counter with the feet wide, and fold forward until your hands rest on it with the arms straight. The back lengthens exactly as it does in the full pose, the head stays well above the heart, and standing up again takes no effort at all.

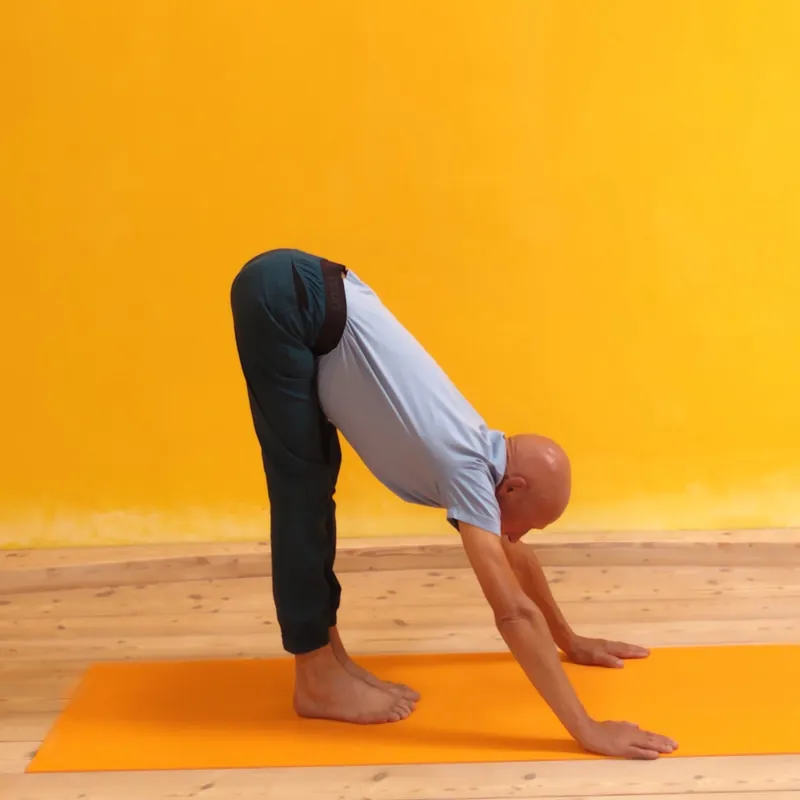
A person standing with the feet together folding forward from the hips with the hands reaching toward the floor.

Standing Forward Fold

Uttanasana

Feet together or hip-width, fold forward, hang. Simple to describe and the one most often done badly, because almost everybody bends from the waist instead of the hips and holds the knees locked.

Building it

  1. Feet hip-width apart. Not together — together is a balance challenge on top of a fold, and there is no reason to combine them.
  2. Soften the knees before you start. A small bend. Locked knees turn this into a hamstring argument you will lose.
  3. Hinge from the hips, hands sliding down the fronts of the legs.
  4. Let the arms and head hang. Hold opposite elbows if that is comfortable.
  5. Shift your weight slightly forward so it is over the middle of the feet rather than back in the heels.
  6. Hold 20 to 30 seconds. Come up slowly with soft knees, rolling up or with a flat back, whichever you prefer.

Take care

Same rule as the wide-legged fold and it matters more here: come up slowly. If you get light-headed standing up quickly in ordinary life, do the chair version instead, every time. Bend the knees as much as you need to — a fold with bent knees is the pose; a fold with a rounded lower back and straight knees is not.

With a chair or a wall

Sit on the front half of a chair with the feet flat and fold forward over your thighs, hands on the floor or on your shins. Everything the standing version offers, with no balance element and nothing to come up from.

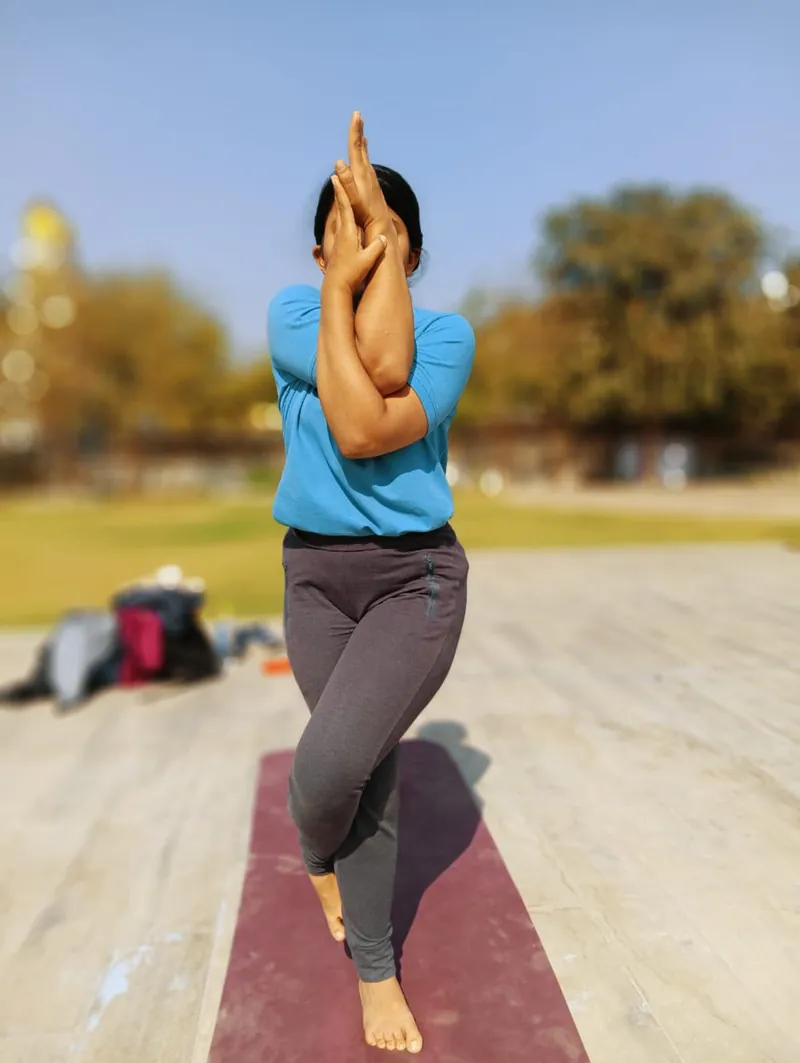
A person standing with one leg crossed over the other and the forearms wrapped around each other in front of the face.

Eagle Arms and Legs

Garudasana

A wrap rather than a stretch. Two things happening at once — the arms crossing and the legs crossing — and they are worth learning one at a time.

Building it

  1. Arms first, standing on both feet. Cross the right elbow under the left, then wrap the forearms so the palms meet, or as close to meeting as they get.
  2. Lift the elbows to shoulder height and push the forearms gently away from your face. The back of the shoulders should feel wide.
  3. If the palms will not meet, hold opposite shoulders instead. That is the same pose.
  4. Legs second, once the arms are familiar. Bend both knees a little, cross the right thigh over the left, and either hook the right foot behind the left calf or let the right toes rest on the floor as a kickstand.
  5. The kickstand version is not a lesser version. Most people should use it most of the time.
  6. Hold 20 to 30 seconds, unwind, and do the whole thing with the left arm and leg on top — which will feel wrong, and should.

Take care

Standing work puts your whole weight through one or two feet, so the rule here is about the floor as much as the body. Do the arms and the legs separately for as long as you like; combining them is not an achievement. If either shoulder pinches, unwrap and hold opposite shoulders. With the legs crossed you are balancing on a narrow base, so have a wall within reach the first several times.

With a chair or a wall

Sit on a chair and do the arm wrap exactly as described, then cross the legs at the thigh if you like. The arm half is the more interesting half and the chair costs you nothing of it.

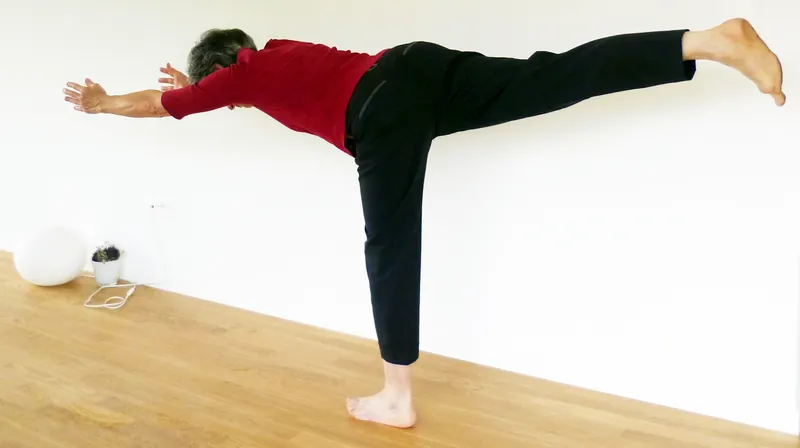
A person balancing on one leg with the torso and the lifted leg both held level with the floor and the arms reaching forward.

Warrior III

Virabhadrasana III

The hardest thing on this page. One leg down, the body and the other leg forming one long horizontal line. Almost everybody should learn it with their hands on something for a long time, and there is no hurry at all.

Building it

  1. Stand facing a chair back, close enough to rest your hands on it with the arms almost straight.
  2. Shift all your weight onto the right foot. Soften that knee — a locked standing knee makes balancing harder, not easier.
  3. Hinge forward from the hips, hands on the chair, and let the left leg lift behind you. Stop when the torso is level and the leg is somewhere near level.
  4. Keep the hips square to the floor. The lifted hip wants to roll open toward the ceiling and the whole shape falls apart when it does. Turn the lifted toes down toward the floor to help.
  5. Push the lifted heel away behind you. You are reaching in two directions, not lifting a leg.
  6. Hold 15 to 30 seconds. Come down with control and do the other side.

Take care

Standing work puts your whole weight through one or two feet, so the rule here is about the floor as much as the body. Use a chair or a wall for this one. Not as a beginner step — as the normal way to do it. Taking the hands off is a separate skill you can spend a year arriving at. Stop immediately if you feel anything in the lower back; the usual cause is lifting the leg higher than the torso, so lower the leg.

With a chair or a wall

Hands on a chair back, as described above, is already the chair version and it is the one we teach in class. For a further step back: stand an arm's length from a wall, place both palms flat on it at shoulder height, and lift one leg behind you. The wall takes as much weight as you want to give it.

Standing Still

Tadasana

Standing still, on purpose, as a pose. It looks like nothing and it is where every other pose on this page comes from. We open and close every class with it. There is no photograph of this one, because a photograph of somebody standing up would tell you nothing that the six steps below do not.

Building it

  1. Stand with the feet hip-width apart and parallel. Look down and check — most people's feet turn out more than they imagine.
  2. Spread your weight across three points on each foot: the base of the big toe, the base of the little toe, and the middle of the heel. This is the tripod the whole site is built on.
  3. Lift and spread the toes, then put them down without changing where the weight is.
  4. Soften the knees a fraction so they are not locked back.
  5. Let the arms hang, palms facing in, shoulders dropping away from the ears.
  6. Stand there for one full minute and notice what moves. You will sway, constantly, in small amounts. That is what standing is.

Take care

There is almost nothing to take care of here, which is the point. If standing still for a minute makes you feel unsteady or light-headed, that is useful information and worth mentioning to a doctor rather than practising through. Stand near a wall while you find out.

With a chair or a wall

Sit tall on the front half of a chair with both feet flat on the floor, hip-width apart, and find the same three points under each foot. Everything the standing version teaches about the feet is available sitting down.

Putting them together

A reasonable twenty minutes, if you want one: Standing Still for a minute, Standing Forward Fold, Wide-Legged Forward Fold, Warrior II on both sides, Extended Side Angle on both sides, Reverse Warrior on both sides, Tree on both sides, and Standing Still again to finish. Hold each one for about thirty seconds and take as long as you like getting between them.

Warrior III and Eagle are left out of that deliberately. They are the two that reward being fresh, so put them near the beginning on a day you want to work on them rather than at the end of everything else.